No Welded Loop, No Problem
When your fly line does not come with a welded loop, what options do you have to attach your leader to your fly line?
Below are four methods we have tried; all will work but there is one in particular that we like.
Do read on!
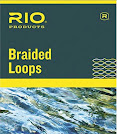
Braided Loop
The Fly Line is inserted into one end of the Braided Loop. Super Glue is then applied to the connection, and then a plastic sleeve is slipped over the connection.
Other brands use a heat shrink tube instead of the plastic sleeve, but the concept is the same.
We have tried this method with several of our fly lines and have had no issues with exception of convenience.
That is, more often than not we are either out of braided loops or forgot where we put them.
The latter being the case for one particular Field Team Member who we will leave un-named.
DIY Loop
The next method calls for making your own fly line loop. There are different techniques to make a fly line loop. Some are elaborate and others are not so elaborate.
In our case, it's not so elaborate...
- Form a loop at the end of the fly line,
- Super Glue the tag end to the fly line,
- Wrap with fly tying Dacron thread or dental floss
- Next, Super Glue the thread or floss,
- And then, apply Head Cement or Tough as Nails Clear Nail Polish.
- Let dry, and then go fishing!
This method worked for us also. The largest fish caught with this connection was a 26" Striped Bass.
However, we noticed our fly line to tippet connection fails first since its connection is a lighter pound test strength compared to the DIY Loop.
Nail Knot
No YouTube or Google back then; it was the County Public Library and fly fishing books that described fly lines made of silk and tippets made of horse hair!
More important, the books instructed a "Newbie" like me to attach my leader to the fly line using a Nail Knot.
The Nail Knot called for wrapping the leader around a nail, slipping the leader or more like surgically weaving it under the wraps, and then finally removing the nail and pulling tight.
In short order, I could quickly replace a leader using the tool even while in the field fishing a river!
Simple and quick to tie. Some fisherman add a little Super Glue to the knot for extra insurance.
But, I tend to pull the knot tight and then leave it "as is". I still use this method but only when I have the Knot Tying Tool. I can still tie the knot using a nail, but it takes me much longer than with the tool.
Luckily, I keep the Knot Tying Tool in my fly vest. However, I am thinking about replacing it with the combination nipper and knot tying tool as I have recently misplaced by nippers!
Nail Knot Variant
The variation from the Nail Knot method is that the leader is not tied directly to the fly line.
Instead, we take an 18" section of 30lbs mono-filament, and tie one end to the fly line with a Nail Knot.
And then, we make a loop in the other end using a Perfection Loop Knot.
Once everything is pulled tight, we attach our leader to our fly line using the loop on our leader to the loop of the 18" section of monofilament.
Like when we use a Braided Loop or a DIY Loop, the Nail Knot Variant allows quick and easy change out of leaders.
Plus it saves us from cutting the fly line and retying the Nail Knot.
+Tippet Rings
With the leader attached to our fly line, we normally use a barrel knot aka blood knot to connect our leader to the tippet.However, we learned about Tippet Rings one season, and we have since added them to our fly fishing list of "really nice to haves".
Using a Trilene Knot or an Improved Clinch Knot, we attach the Tippet Ring to the leader.
Then, using the same Trilene Knot or Improved Clinch Knot, we attach the tippet to the Tippet Ring.
In short order, we can replace tippets as quick as we can tie a knot. And, in some Seasons, we have not replaced a leader which definitely saves a buck or two given the cost of fly leaders!
Do give them a try! Just be sure to leave the Tippet Ring on the snap swivel while attaching it to your leader, and then take it off the swivel. Else, you may have a hard time otherwise as the rings are small, really small!
Final Thoughts... One Method In Particular!
Although there are other ways to accomplish what we described above, we seem to keep using these connections year in and year out. Moreover, we have been using the Nail Knot Variant more often lately since...
We ran out of Braided Loops; are too lazy as well as impatient to make a DIY Loop (gotta glue, then wrap, then let it dry,... by then, we could have gone fishing already); and tying the Nail Knot is quick especially with a Nail Knot Tying Tool but we hate to cut off a piece of expensive Fly Line every time we change Leaders!
All for now and Good Luck and Good Fishing!
"Don't Cut Your Fly Line. Please!"
COAF Field Team YouTube Channel


